Introduction
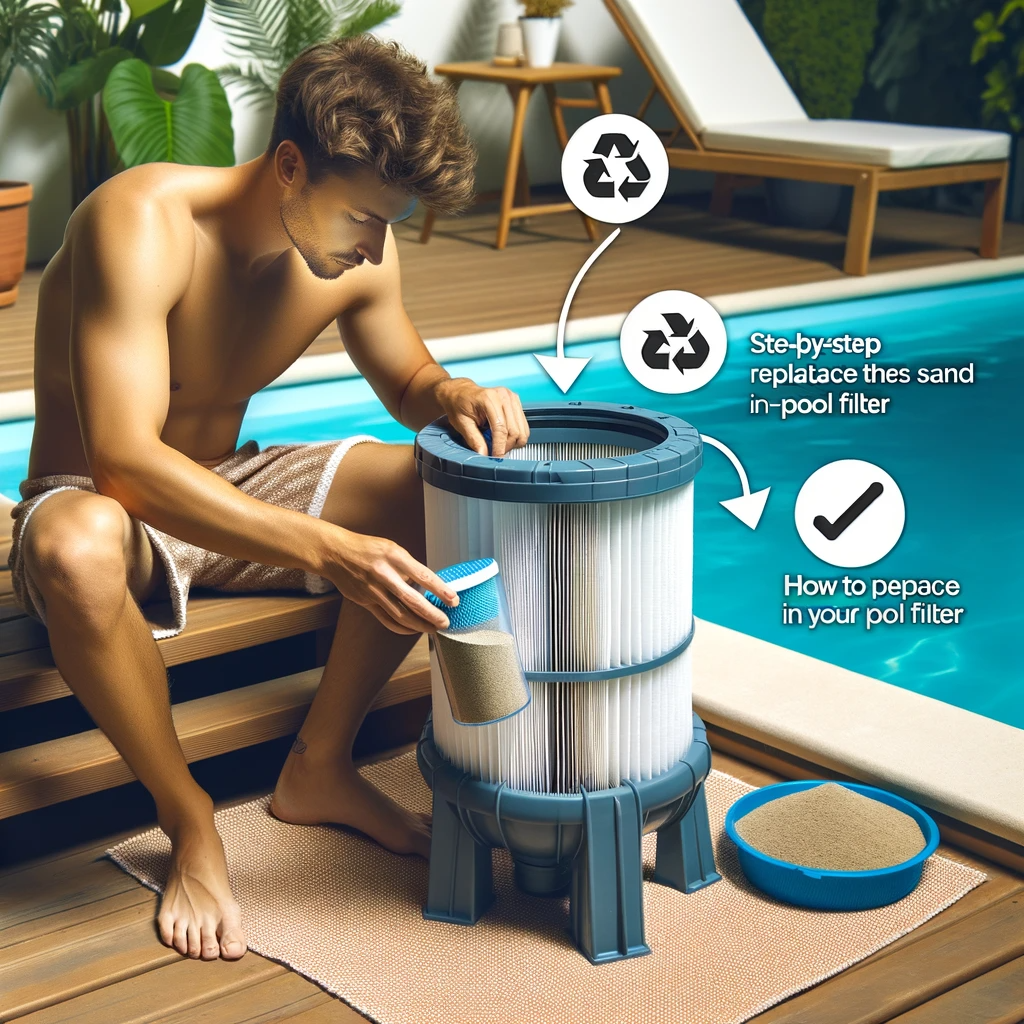
Welcome to our step-by-step guide on how to replace the sand in your pool filter. As a pool owner, it’s important to maintain your pool’s efficiency and ensure crystal-clear water for a refreshing swimming experience. Over time, the sand in your pool filter can become worn out and less effective at trapping dirt and debris. That’s where this guide comes in handy.
In this article, we will provide you with valuable tips and instructions for replacing the sand in your pool filter. By following these steps, you’ll be able to maintain optimal filtration and extend the lifespan of your pool equipment. We’ll also highlight common mistakes to avoid during the replacement process, ensuring that you have a smooth and successful experience.
Regular maintenance of your pool sand filter is crucial for keeping your pool water clean and safe. By replacing the sand when necessary, you’ll prevent clogs, improve water circulation, and enhance overall filtration efficiency. With our easy-to-follow guide, even DIY enthusiasts can confidently tackle this task.
So let’s dive into the details of replacing the sand in your pool filter! Get ready to learn essential techniques that will help you maintain a sparkling clean swimming pool throughout the year.
Understanding Your Pool Sand Filter
What is a pool sand filter?
A pool sand filter is an essential component of your pool’s filtration system. It works by trapping and removing impurities from the water, ensuring that your pool remains clean and safe for swimming. The filter consists of a tank filled with specially graded sand that acts as the filtering medium.
When water enters the filter, it flows through the bed of sand, which captures dirt, debris, and even microscopic particles. As the water passes through the sand, it undergoes a process called mechanical filtration. This means that solid particles are physically trapped in the tiny spaces between the sand grains.
Benefits of using a sand filter in your pool
There are several advantages to using a sand filter in your pool:
- Effective filtration: Pool sand filters are highly efficient at removing impurities from the water. They can capture particles as small as 20-40 microns, leaving your pool water clear and free from debris.
- Low maintenance: Compared to other types of filters, such as cartridge or diatomaceous earth (DE) filters, sand filters require less maintenance. Backwashing the filter periodically helps clean out trapped debris and keeps it functioning optimally.
- Cost-effective: Sand filters are generally more affordable than other types of filters and have a longer lifespan. With proper care and regular maintenance, they can last for many years.
Signs that your sand filter needs replacement
Over time, even with regular maintenance, the effectiveness of your pool’s sand filter may diminish. Here are some signs that indicate it’s time to replace the sand:
- Poor water clarity: If you notice that your pool water is consistently cloudy or has visible particles floating around, it could be an indication that your sand filter is no longer effectively trapping contaminants.
- Increased pressure: A significant increase in pressure on the pressure gauge of your filtration system can be a sign of clogged or worn-out sand. This can result in reduced water flow and compromised filtration.
- Inefficient backwashing: If the backwashing process doesn’t clear out trapped debris as effectively as before, it may be a sign that the sand is no longer capable of properly filtering the water.
Regular sand replacement is essential to maintain the efficiency of your pool’s filtration system. By following our step-by-step guide, you’ll ensure that your pool remains clean and inviting for all your swimming adventures.
Preparing for Sand Replacement
Before you begin replacing the sand in your pool filter, it’s important to gather all the necessary tools and materials. Additionally, you’ll need to turn off the pool equipment to ensure a safe and smooth replacement process.
Gathering the necessary tools and materials
Here is a list of tools and materials you will need for replacing the sand in your pool filter:
- Screwdriver or wrench: You may need these tools to remove any screws or bolts securing the filter tank.
- Pool filter sand: Purchase enough high-quality pool filter sand to fill your filter tank. The amount needed will depend on the size of your filter.
- Filter media alternative (optional): Some pool owners prefer using alternatives to traditional sand, such as glass media or zeolite. These options offer improved filtration and longer lifespan but may require different quantities compared to regular sand.
- Garden hose: You’ll need a garden hose with a spray nozzle attachment for rinsing and cleaning various components during the replacement process.
- Plastic sheet or tarp: To protect your working area from spills and debris, lay down a plastic sheet or tarp before starting the replacement.
- Bucket or container: Have a bucket or container ready for collecting any water that remains in the filter tank during draining.
- Pipe sealant tape: If necessary, use pipe sealant tape to ensure proper sealing when reassembling any threaded connections.
You can find most of these tools and materials at local pool supply stores or online retailers specializing in pool maintenance products.
Turning off the pool equipment
Before proceeding with the sand replacement, it’s crucial to turn off your pool equipment properly. This step ensures safety and prevents any damage during the process:
- Locate the circuit breaker panel that controls power to your pool pump and switch it off.
- Turn off any valves connected to the pump/filter system to stop water flow into the filter.
- If your pool system has a multiport valve, set it to the “Closed” or “Winterize” position to prevent water from entering the filter during the replacement.
- Finally, turn off the pool pump by flipping its switch or shutting off its power supply.
By following these steps, you’ll create a safe working environment and prevent any potential accidents while replacing the sand in your pool filter. Now that you have gathered all the necessary tools and turned off the equipment, you’re ready to move on to draining and removing the old sand.
Removing the Old Sand
Once you have gathered the necessary tools and turned off your pool equipment, it’s time to remove the old sand from your filter. This process involves draining the water from the filter tank and then removing the existing sand.
Draining the pool filter
To drain the water from your pool filter, follow these steps:
- Locate the drain plug or valve at the bottom of the filter tank. Attach a garden hose to it, ensuring a secure connection.
- Place the other end of the garden hose in an appropriate drainage area, away from plants or areas prone to erosion.
- Open the drain plug or valve, allowing water to flow out through the hose. Monitor this process closely to ensure proper drainage.
- While draining, be cautious not to damage any nearby electrical components or connections.
Removing the old sand
After draining, it’s time to remove the old sand from your pool filter. Here are some methods you can use:
- Scooping: Use a small bucket or scoop to manually remove as much sand as possible from inside the filter tank. Be careful not to damage any internal components while doing this.
- Vacuuming: If there is still a significant amount of sand left in your filter tank after scooping, you can use a wet/dry vacuum cleaner with a narrow attachment to suction out remaining particles.
- Flushing: Connect a garden hose with a high-pressure nozzle attachment to thoroughly flush out any remaining sand particles from inside the filter tank.
Tips for thorough cleaning of the filter tank:
- Inspect and clean all internal parts of your pool filter during this process.
- Use a soft brush or cloth to scrub away any debris or residue on surfaces.
- Rinse all components thoroughly with clean water before proceeding with adding new sand.
By properly draining and removing old sand from your pool filter, you’ll ensure that your filtration system is ready for fresh media installation. In our next section, we will guide you through choosing and adding new sand for optimal filtration performance.
Choosing the Right Sand
When it comes to replacing the sand in your pool filter, it’s essential to choose the right type of filter sand for optimal performance. Understanding the different options available and considering certain factors will help you make an informed decision.
Understanding different types of filter sand
There are various types of filter sands available on the market. Here are a few common options:
- Silica sand: This is the most commonly used type of sand for pool filters. It is affordable, readily available, and effective at trapping particles down to 20-40 microns in size.
- Zeolite: Zeolite is a natural mineral that offers superior filtration compared to silica sand. It can capture particles as small as 5 microns and has excellent water-holding capacity.
- Glass media: Made from recycled glass, this alternative to traditional sand provides exceptional filtration and requires less frequent backwashing. Glass media can trap particles as small as 3 microns.
Each type of filter sand has its own pros and cons, so consider your specific needs and budget when making a choice.
Selecting the appropriate sand for your pool
To select the right sand for your pool, consider the following factors:
- Filtration requirements: Determine the level of filtration you desire based on your pool usage, location, and water quality. If you have high bather loads or frequently deal with fine debris, a more efficient option like zeolite or glass media may be beneficial.
- Compatibility with your filter system: Check your pool manufacturer’s recommendations or consult with a professional to ensure that the chosen sand is compatible with your specific filter system.
- Grain size and uniformity: Look for sands that have consistent grain sizes within the recommended range for pool filters (typically 0.45mm – 0.55mm). Avoid sands with too many fines or coarse particles that can lead to channeling or reduced filtration efficiency.
- Budget considerations: Consider the cost of different types of filter sands along with their lifespan and maintenance requirements before making a final decision.
By understanding the different types of filter sands available and considering these factors, you’ll be able to select the appropriate sand that meets both your filtration needs and budget constraints. In our next section, we will guide you through preparing the filter tank for new sand installation.
Adding New Sand
After selecting the appropriate sand for your pool filter, it’s time to prepare the filter tank and add the new sand. This process ensures proper filtration and efficient operation of your pool system.
Preparing the filter tank for new sand
To prepare the filter tank for new sand, follow these steps:
- Clean the tank: Thoroughly clean the inside of the filter tank using a hose or pressure washer. Remove any debris, dirt, or remnants of old sand. Ensure that all surfaces are free from residue.
- Inspect and replace laterals or standpipe: Check the condition of the laterals (small pipes at the bottom of the filter) or standpipe (central pipe). Replace any damaged or worn-out components to prevent leaks and ensure even distribution of water during filtration.
- Check for cracks or damage: Examine the filter tank for any cracks, leaks, or signs of damage. Repair or replace any faulty parts before proceeding with adding new sand.
- Ensure proper placement: If you removed any parts during cleaning, make sure to reinstall them correctly according to manufacturer instructions. Proper placement ensures optimal performance and prevents issues such as channeling.
Pouring and leveling the new sand
Follow these instructions to add and level the new sand in your pool filter:
- Pouring the sand: Slowly pour the new sand into the filter tank using a scoop or funnel. Be careful not to disturb or displace any internal components while pouring.
- Fill to recommended level: Fill the tank with enough sand until it reaches the recommended level specified by your pool manufacturer or based on your specific filter model.
- Leveling: Use a straight edge (such as a piece of wood) across the top surface of the sand bed to ensure an even distribution and level bed height throughout.
- Avoid compacting: Do not overly compact or tamp down on the sand bed as this can restrict water flow and reduce filtration efficiency.
By properly preparing and adding new sand to your pool filter, you’ll ensure optimal filtration performance and maintain crystal-clear water in your swimming pool. In our next section, we will guide you through reassembling and testing your newly filled filter system.
Reassembling and Testing the Filter
Once you have added the new sand to your pool filter, it’s time to reassemble the filter components and test the system to ensure everything is working properly.
Reassembling the filter components
Follow these steps to put the filter back together:
- Refer to your pool manufacturer’s instructions: Consult the manual or documentation provided by your pool manufacturer for specific guidance on reassembling your filter. This will ensure that you correctly reinstall all components.
- Start with laterals or standpipe: Begin by placing the laterals or standpipe back into their designated positions at the bottom of the filter tank. Ensure they are securely in place.
- Reinstall other parts: Carefully reinstall any other components that were removed during cleaning or sand replacement, such as diffusers, grids, or cartridges. Follow proper alignment and fastening procedures as specified by your pool manufacturer.
- Check for proper fit: Double-check that all parts are properly aligned and fitted together before proceeding to testing.
Testing the filter system
After reassembling, it’s crucial to test your newly filled filter system to ensure its functionality:
- Priming: Prime your pool pump according to manufacturer instructions. This typically involves filling the pump with water until it flows out of any air relief valves or vents.
- Turn on the equipment: Switch on your pool pump and allow it to run for a few minutes while checking for any leaks around connections or seals.
- Test water flow: Observe water flow from return jets in your pool. It should be steady and consistent without any unusual noises or disruptions.
- Check pressure gauge: Monitor the pressure gauge on your filtration system while running it under normal operating conditions. Note any significant changes in pressure levels, which could indicate issues with filtration efficiency or blockages.
- Backwash if necessary: If there is an initial rise in pressure after starting up, perform a backwash cycle following proper procedures outlined by your pool manufacturer.
By carefully reassembling and testing your filter system, you’ll ensure that everything is functioning correctly after replacing the sand in your pool filter. In our next section, we will discuss essential maintenance tasks for keeping your pool sand filter in optimal condition.
Maintaining Your Pool Sand Filter
To keep your pool sand filter in optimal condition and ensure efficient filtration, regular maintenance tasks and monitoring of filter pressure and performance are essential.
Regular maintenance tasks
Follow these recommended maintenance tasks to keep your pool sand filter operating at its best:
- Backwashing: Backwash your filter regularly to remove trapped debris and maintain proper water flow. This process involves reversing the water flow through the filter to flush out accumulated dirt. Refer to your pool manufacturer’s instructions for the recommended frequency of backwashing.
- Cleaning the pump basket: Clean out the pump basket regularly to remove leaves, debris, or other objects that may hinder proper pump operation. Turn off the pump before removing and cleaning the basket.
- Inspecting and cleaning the skimmer basket: Check and clean the skimmer basket frequently to prevent clogs that can affect water circulation and filtration efficiency.
- Checking for leaks: Regularly inspect all connections, seals, and valves for any signs of leaks or drips. Address any issues promptly to avoid further damage or loss of filtration effectiveness.
- Maintaining proper water chemistry: Regularly test and balance your pool water chemistry by adjusting pH levels, sanitizer levels (such as chlorine), alkalinity, and calcium hardness. Balanced water chemistry helps prevent scale buildup on the sand bed and ensures optimal filtration.
Monitoring filter pressure and performance
Monitoring filter pressure is crucial for maintaining a well-functioning pool sand filter:
- Pressure gauge readings: Keep an eye on the pressure gauge on your filtration system during normal operation. Note the typical range of pressure when your system is clean after backwashing.
- Increased pressure: If you notice a significant increase in pressure compared to normal operating levels, it may indicate that it’s time for another round of backwashing or even a sand replacement if backwashing no longer restores proper flow rates.
- Reduced flow or cloudy water: If you observe reduced water flow from return jets or notice cloudy water despite regular maintenance efforts, it could be a sign of reduced filter performance due to clogged sand or other issues.
By following a regular maintenance schedule and monitoring your pool sand filter’s pressure and performance, you’ll ensure efficient filtration, extend the lifespan of your equipment, and enjoy crystal-clear water in your swimming pool.
Common Mistakes to Avoid
When replacing the sand in your pool filter, it’s important to be aware of common mistakes that can compromise the effectiveness of your filtration system. By avoiding these errors, you’ll ensure optimal performance and longevity of your pool equipment.
Overfilling or underfilling the filter tank
One common mistake is incorrect sand levels in the filter tank. Both overfilling and underfilling can have negative consequences:
- Effects of overfilling: If you add too much sand, it can restrict water flow and lead to channeling. This means that water will find a path of least resistance through the sand bed, bypassing proper filtration. As a result, debris may not be effectively trapped, reducing filtration efficiency.
- Effects of underfilling: On the other hand, if you don’t add enough sand, there won’t be sufficient surface area for effective filtration. This can result in poor water clarity and reduced removal of contaminants from your pool.
To achieve the right amount of sand:
- Consult manufacturer guidelines: Refer to your pool manufacturer’s instructions or consult a professional to determine the recommended amount of sand for your specific filter model.
- Use proper measurements: Measure the correct amount of sand based on your filter’s specifications. Avoid estimating or guessing as this can lead to inaccurate levels.
- Level and distribute evenly: After pouring the sand into the filter tank, use a straight edge or similar tool to ensure an even distribution and level bed height throughout.
Using the wrong type of sand
Using improper filter sand is another mistake that can impact filtration efficiency:
- Consequences of using incorrect sand: Different types of filters require specific types and sizes of media for optimal performance. Using the wrong type of sand can result in inadequate particle trapping, reduced flow rates, increased pressure, or even damage to internal components.
To identify the correct sand for your filter:
- Refer to manufacturer recommendations: Check your pool manufacturer’s guidelines or consult with a professional to determine the appropriate type and size specifications for your specific filter model.
- Research different options: Understand the characteristics and benefits of various types of filter sands available on the market before making a decision.
- Purchase from reputable sources: Ensure that you purchase high-quality filter sands from trusted suppliers who specialize in pool maintenance products.
By avoiding these common mistakes and following proper procedures when replacing your pool filter’s sand, you’ll maintain efficient filtration and enjoy clean, clear water in your swimming pool.
Conclusion
Maintaining a clean and clear pool is essential for an enjoyable swimming experience, and replacing the sand in your pool filter plays a crucial role in achieving this. By following the step-by-step guide outlined in this article, you can ensure that your pool’s filtration system operates at its best.
Proper maintenance of your pool sand filter is key to efficient filtration and extends the lifespan of your equipment. Regularly backwashing, cleaning the pump basket, inspecting for leaks, and balancing water chemistry are all important tasks to include in your maintenance routine.
Avoiding common mistakes such as overfilling or underfilling the filter tank and using the wrong type of sand will help you maintain optimal filtration performance. By selecting the appropriate sand for your specific filter model and ensuring accurate sand levels, you’ll maximize the effectiveness of your filtration system.
Following proper procedures throughout the entire process of replacing the sand in your pool filter is crucial. From gathering tools and materials to reassembling and testing the system, attention to detail ensures a successful outcome.
So go ahead and enjoy your pool with confidence, knowing that you have a well-maintained sand filter that keeps your water sparkling clean. With regular maintenance and timely sand replacements, you can create a refreshing oasis right in your own backyard. Dive in and make lasting memories while enjoying crystal-clear water all season long!